I’ve been experimenting with using Zig for simple games and graphics lately. Raylib is a great library for 2D graphics, ut it took me a while to figure out how to setup with Zig. So I thought I’d write up a quick guide.
This will essentially be re-iterating the information found in in the raylib-zig README. But I everytime I’ve gone to setup the raylib with Zig I had to re-figure out how to do this. So this is more of a guide for my future self then it being useful for others 😅.
Install Zig
Install the latest stable version of Zig by following the instructions on the Zig website.
I recommend using something like zigup to install Zig. This makes switching between versions easy.
As of time of writing, Zig 0.13.0 is the latest version.
Create a new Zig project
Create a new directory for your project and navigate into it.
mkdir zig-with-raylib
cd zig-with-raylib
Initialize a new Zig project.
zig initAdd Raylib
We will be using the raylib-zig bindings. Fetch the bindings with:
zig fetch --save https://github.com/Not-Nik/raylib-zig/archive/devel.tar.gzConfigure build.zig
After installing the exe artifact, configure the raylib dependency in build.zig.
b.installArtifact(exe); // already exists

const raylib_dep = b.dependency("raylib-zig", .{
    .target = target,
    .optimize = optimize,
});

const raylib = raylib_dep.module("raylib");
const raylib_artifact = raylib_dep.artifact("raylib");

exe.linkLibrary(raylib_artifact);
exe.root_module.addImport("raylib", raylib);
Render something
Now you can just copy the code in the README from raylib-zig. But lets get setup with something a little more structured.
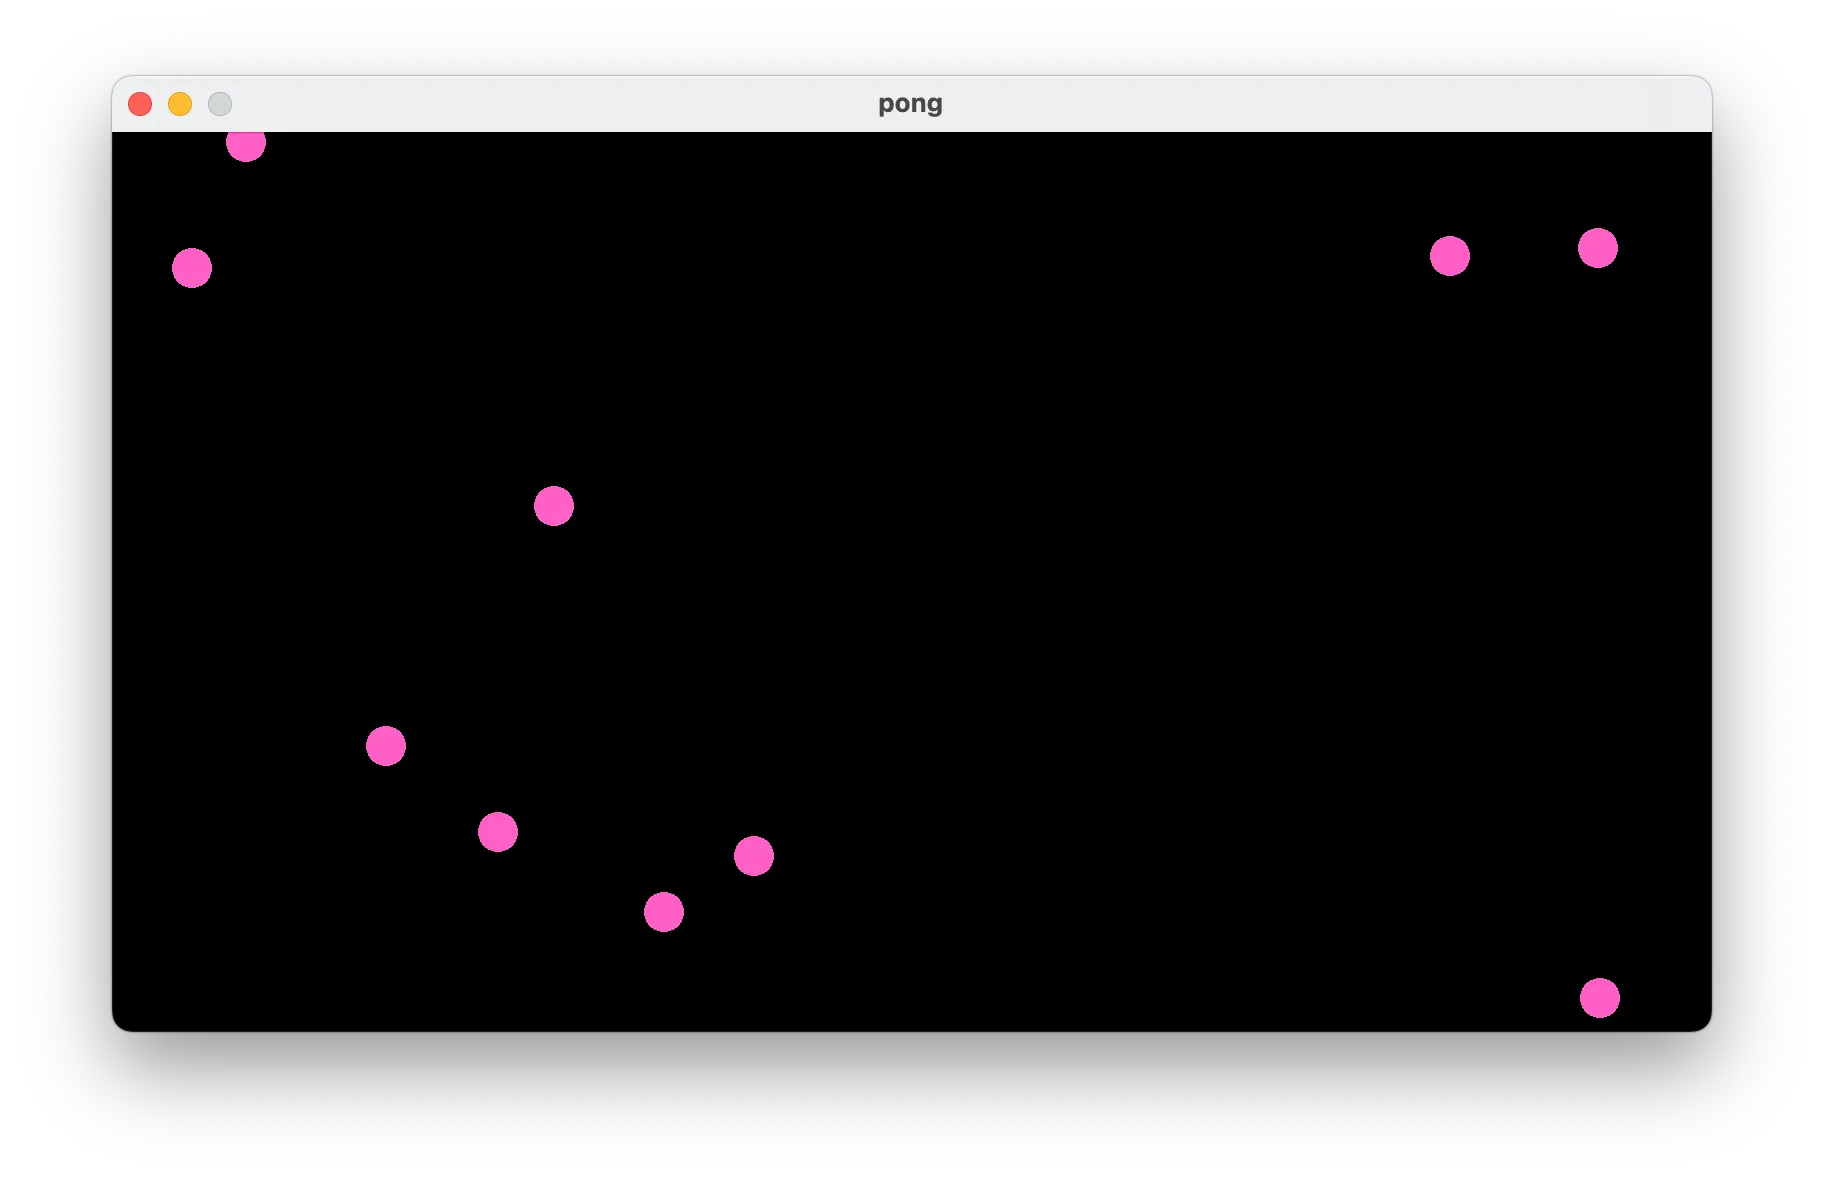
We are going to make a little program where a bunch of balls bounce around the screen.
Imports and constants
Lets define some imports and constants in the main.zig file.
const std = @import("std");
const rl = @import("raylib");

const num_balls = 10;

const screen_width = 800;
const screen_height = 450;

const frame_rate = 60.0;
const tick_rate = 30.0; // 30 ticks per second
Ball and game state
Lets define a Ball and a GameState.
The Ball struct will hold the position and velocity of a ball. The GameState
struct will hold a list of balls and the init, update, and draw methods
for the game state.
I like this pattern for simple games because it keeps things pretty organized.
Each object is in control of its own state and behaviour. The GameState object
controls the game loop and the Ball objects are responsible for their own
movement and drawing.
const Ball = struct {
    pos: rl.Vector2,
    vel: rl.Vector2,

    pub fn random_ball(rng: *std.rand.DefaultPrng) Ball {
        return Ball{
            .pos = .{
                .x = rng.random().float(f32) * screen_width,
                .y = rng.random().float(f32) * screen_height,
            },
            .vel = .{
                .x = rng.random().float(f32) * 5 + 5,
                .y = rng.random().float(f32) * 5 + 5,
            },
        };
    }

    pub fn update(self: *Ball) void {
        self.pos.x += self.vel.x;
        self.pos.y += self.vel.y;

        // Bounce off walls
        if (self.pos.x <= 0 or self.pos.x >= screen_width) {
            self.vel.x *= -1;
        }
        if (self.pos.y <= 0 or self.pos.y >= screen_height) {
            self.vel.y *= -1;
        }

        // Ensure the ball stays within the screen bounds
        self.pos.x = std.math.clamp(self.pos.x, 0, screen_width);
        self.pos.y = std.math.clamp(self.pos.y, 0, screen_height);
    }

    pub fn draw(self: Ball) void {
        rl.drawCircle(@intFromFloat(self.pos.x), @intFromFloat(self.pos.y), 10, rl.Color.pink);
    }
};

const GameState = struct {
    balls: []Ball,

    pub fn init(allocator: std.mem.Allocator, rng: *std.rand.DefaultPrng) !GameState {
        var balls = try allocator.alloc(Ball, num_balls);
        errdefer allocator.free(balls);

        var i: usize = 0;
        while (i < num_balls) : (i += 1) {
            balls[i] = Ball.random_ball(rng);
        }

        return GameState{ .balls = balls };
    }

    pub fn update(self: *GameState) void {
        for (self.balls) |*ball| {
            ball.update();
        }
    }

    pub fn draw(self: *GameState) void {
        for (self.balls) |ball| {
            ball.draw();
        }
    }
};
Main
Now we can write our main function. This will handle initializing Raylib and
our game state. It will also handle the game loop and exit when the window is
closed.
pub fn main() anyerror!void {
    var rng = std.rand.DefaultPrng.init(@intCast(std.time.milliTimestamp()));

    rl.initWindow(screen_width, screen_height, "pong");
    defer rl.closeWindow();

    const target_tick_rate = 1.0 / tick_rate;
    var accumulated_time: f32 = 0.0;

    rl.setTargetFPS(frame_rate);

    var gpa = std.heap.GeneralPurposeAllocator(.{}){};
    defer _ = gpa.deinit();
    const allocator = gpa.allocator();

    // Create balls
    var game_state = try GameState.init(allocator, &rng);
    defer game_state.deinit(allocator);
    // Main game loop
    while (!rl.windowShouldClose()) {
        const deltaTime = rl.getFrameTime();
        accumulated_time += deltaTime;

        while (accumulated_time >= target_tick_rate) {
            game_state.update();

            accumulated_time -= target_tick_rate;
        }

        rl.beginDrawing();
        rl.clearBackground(rl.Color.black);

        // Draw the game state
        game_state.draw();

        rl.endDrawing();
    }
}
Run the program
Lets run the program and see what we get.
zig build runAnd there we have it! A bunch of pink balls bouncing around the screen.
Repo
You can find all the code for this post here.
If interested, you can also take a look at a pong game I made using raylib and zig.